Controlling GPIO on the Z-Turn Lite board with Xillinux
Introduction
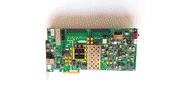
This post shows how to access some GPIO functionalities from Xillinux running on a Z-Turn Lite board (with an Z-turn Lite IO Cape board attached), directly from the command line.
Watchdog
When the “WD” jumper at J26 on the board is placed, it’s possible to utilize the board’s watchdog chip, which resets the processor if its watchdog-clear pin isn’t toggled for 1.2 seconds. If that pin is in high-Z, the watchdog is inactive, and doesn’t reset the processor even if no toggling has taken place. This can be achieved either by removing the “WD” jumper, which floats the pin, or making the pin high-Z by setting the relevant GPIO to an input (Xillinux ensures the latter, so booting it with the “WD” jumper is safe).
When the pin is high-Z, a small sawtooth-like pulse, which is a few microseconds wide, is visible with an oscilloscope every 1.2 sec, and it’s the watchdog driving the pin to verify that the wire is in high-Z.
The watchdog’s clear pin is wired to the Zynq’s PS-only pin MIO0, which is configured as GPIO 0.
To take control of this pin from the command line:
# echo 0 > /sys/class/gpio/export
# echo out > /sys/class/gpio/gpio0/direction
These commands turn the GPIO into an output, and hence it’s not a high-Z anymore. The pin must start toggling every 1.2 seconds from this moment, or the processor is reset.
To prevent this reset, the following command can be used:
# while [ 1 ] ; do echo 1 > /sys/class/gpio/gpio0/value ; echo 0 > /sys/class/gpio/gpio0/value ; sleep 0.5 ; done
This works on MYiR’s OOB Linux as well (not just Xillinux).
Sensing the IO Cape board’s pushbutton
Not to be confused with the button on the Z-Turn Lite board itself, this is how to fetch the value of the button on the IO Cape Board:
# echo 88 > /sys/class/gpio/export
# cat /sys/class/gpio/gpio88/direction
in
# cat /sys/class/gpio/gpio88/value
This prints out 0 or 1, depending on the button’s state.
Controlling the IO Cape board’s J8 pins
Out of the box, Xillinux routes 34 GPIO I/Os to the IO Cape board’s J8 connector. This can be modified easily by editing the top-level module of Xillinux’ logic design, but this is beyond this post’s scope.
The 34 pins are wired to the connector’s pins 3 to 36. In Linux, to access pin N on the J8, request GPIO number N+51.
For example, in order to toggle pin J8/3, the GPIO to request is 3 + 51 = 54, so the following commands at shell prompt cause some fast toggling:
# echo 54 > /sys/class/gpio/export
# echo out > /sys/class/gpio/gpio54/direction
# while [ 1 ] ; do echo 1 > /sys/class/gpio/gpio54/value ; echo 0 > /sys/class/gpio/gpio54/value ; done
The GPIO pins can also be used as inputs, by following the standard Linux API for GPIO. Note however that pins J8/31 and J8/34 are pulled up with resistors on the IO Cape board.